DVD to MPG4
All websites and YouTube support MPG4 format. I found this to be the best way to avoid problems and keep the high quality video low in size. I strongly recommend it and do it myself all the time. If you watch the video clip and follow the bullet points you will create the perfect MPG4 file ready to be uploaded onto the web.
- Download MPEG Streamclip: http://www.squared5.com/
- Open the DVD using MPG Stream Clip
- Use ‘Fix Timecode Breaks’ to fix this stream
- You can select a segment by position the play line on the start and press I (for In) then position the play line on the end part and press O (For Out)
- File > Export to MPG4
- iTunes > (please Select a preset)
- Quality > %100
- Frame Rate > 25
- Make MPG4
- I recommend saving your new file to an external drive, to help your computer work faster.
Enjoy your video clip on the web.
DVD to AVI (DVD to QT)
Over the year, I have received a number of calls, asking me how to convert family DVDs to a file that can be edited. The step by step instructions below will help you to successfully create the AVI file you need for further editing (Quick Time files are good only for Mac and will not work with PC programs). If you watch the video clip and follow the bullet points you will create the AVI file successfully. Happy editing!
- Download MPEG Streamclip: http://www.squared5.com/
- Open the DVD using MPG Stream Clip
- Use ‘Fix Timecode Breaks’ to fix this stream
- You can select a segment by position the play line on the start and press I (for In) then position the play line on the end part and press O (For Out)
- File > Export to AVI
- Compression – Apple DV – Pal
- Option – Aspect Ratio – Select 4:3 16:9
- Quality – %100
- Sound – Uncompressed
- Frame Rate – 25
- Frame size (Confirm the automatic selection)
- Make AVI
- I recommend saving your new file to an external drive, to help your computer work faster.
- Happy editing!
In this video clip I will guide you step by step how to convert A Nice Guy Precious Memories DVD into a video file that allow you to do further editing.
Convert an External Hard Drive from Apple to PC
If you try to use an external hard drive that’s been formatted for Mac OS, you’ll find that it will not work on your PC. To convert an external hard drive from Apple to PC you’ll have to format the drive so that it can be read by PC.
- Transfer any files or folders that you wish to keep from the external hard drive to another computer. If you wish to use a PC you will need ‘mac drive’ to complete the operation – http://www.squared5.com/
- Connect the external hard drive to the PC
- Click the ‘Start’ icon in the lower left hand corner of the PC desktop. Select ‘Control Panel’ from the pop-up menu. Open ‘Administrative Tools’ at the top of the Control Panel menu.
- Select ‘Computer Management’ from the Administrative Tools menu. Highlight ‘Disk Management’ on the left hand side of the Administrative Tools menu to bring up the disk management interface.
- Locate the external hard drive in the disk management interface. The drives are identified in the first column of the management screen.
- Right click on the external hard drive. Select ‘Format’ from the context menu. When prompted by the system, click ‘OK’ to proceed and then ‘OK’ again to confirm your choice.
Convert YouTube video clip to a video file
STEP ONE:
Locate your video clip

STEP TWO:
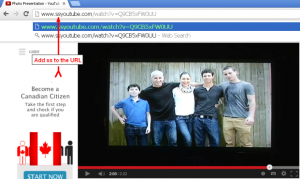
Type the letters ‘ss’ in the URL address bar before the word ‘youtube’ and click enter.
STEP THREE:
Select FLV 480p(for high quality then download

STEP FOUR:
The file will download into your ‘downloads’ folderSTEP FIVE:
Convert the Flash Video into a video file using the MPGStream Clip.Create a simple slide show
- Save all the photos into a single folder
- Make sure that all the photos are facing the right way up
- Make sure the photos are cropped
- Make sure that they are in the correct order (if needed)
- Rename all the photos (select all > R click on the first photo > Rename > Job done!)
- Insert a blank CD
- Insert your new data photos presentation into your DVD player > Press play
- Enjoy!